Postbacks are required for any rewarded moment, offer wall and rewarded pop-up that you want to use inside your apps. For interstitials and native ads, postbacks are optional.
To set up a postback for one of your ad units, follow these steps:
Inside the relevant ad unit’s tab, click on the ‘Define Postback‘ button. The following form will appear: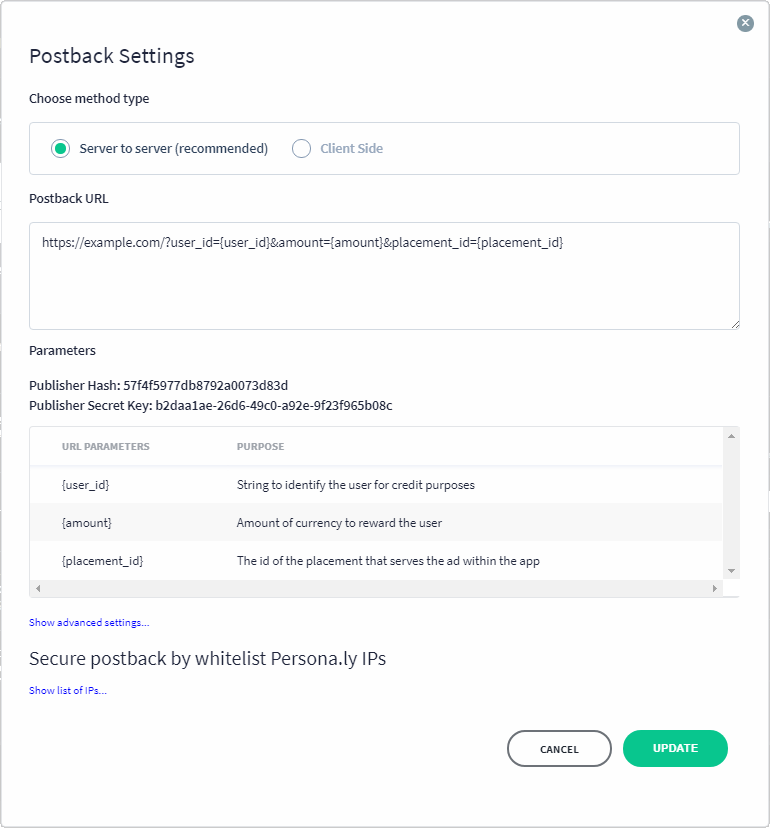 Start by choosing your Reporting Method, and then:
For Server to Server reporting:
- Enter your postback URL and enter the parameters you need from the list.
- If you require any additional parameters in your postback, click on advanced settings to see a list of advanced parameters.
- For postback security, please refer to the postbask security article.
For Client Side reporting, on Android:
Check for rewards in the onRewarded method of the listener:
@Override
 public void onAdRewarded(Impression impression) {

    // user saw the full ad and we can reward him with currency
    int amount = impression.getRewardedAmount();

    // optional values
    boolean hasRewaredAmount = impression.hasRewardedAmount();
    boolean isRewardedVideo = impression.isRewardedVideo();
    boolean isRewardedPlayable = impression.isRewardedPlayable();
}
on iOS:
Implement Campaign Delegate in order to get notifications from our SDK about received rewards. Set delegate:
Swift

Personaly.campaignDelegate = self
Objective C

[Personaly setCampaignDelegate:self];
Click on Update.
After the postback is created, and when you’re ready to go live, make sure to set the ad placement to active. If you run into any issues, make sure to contact your account manager for assistance.